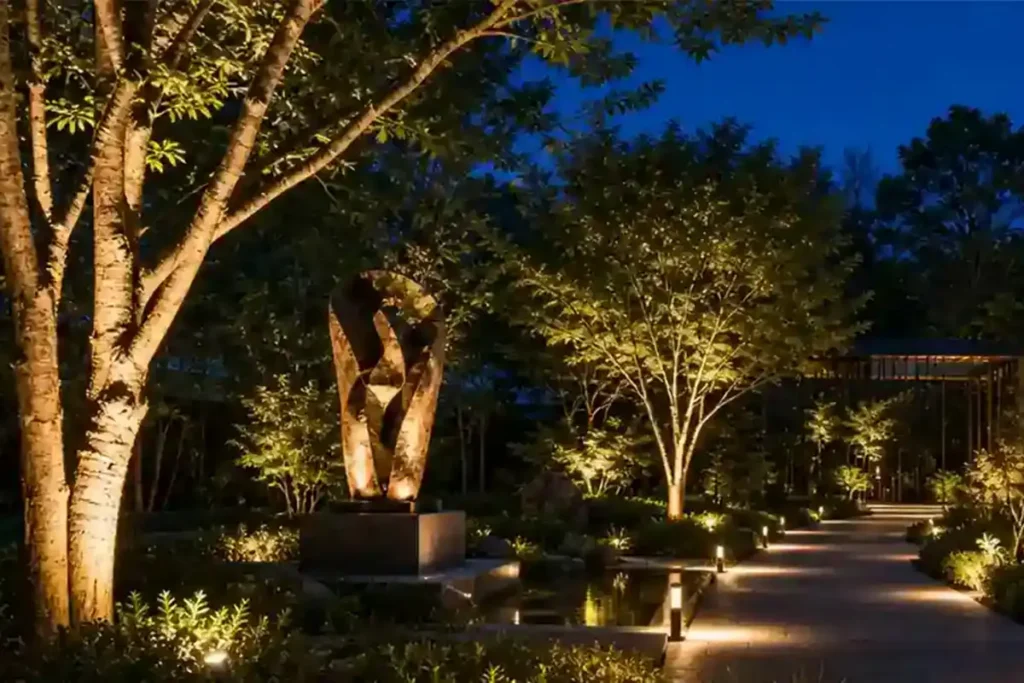
Incorrect beam angle selection can cause uneven lighting, hotspots, insufficient coverage, and costly project adjustments.This guide will help you understand how to select and adjust beam angles based on different applications, installation distances, and lighting goals to achieve better lighting effects and reduce project risks.
Table of Contents
1. Understanding Beam Angle: Why It Matters in Landscape Lighting Projects
1.1 Definition of Beam Angle
Beam angle refers to the angle at which light spreads from an LED fixture.
Simply speaking, it determines how wide or narrow the light distribution will be after leaving the fixture.
In professional landscape projects, beam angle selection directly affects illumination uniformity, visual comfort, and fixture quantity.
1.2 Why Beam Angle Matters in Landscape Lighting
In professional landscape projects, the wrong beam angle can create several common problems:
1.2.1 Uneven Lighting and Hotspots
A beam angle that is too narrow may concentrate too much light in a small area, creating bright hotspots and strong contrast.
For example, when you use a narrow beam spotlight for a large tree or wide facade, only part of the surface may be illuminated while surrounding areas remain dark.
On the other hand, a beam angle that is too wide may spread light too much, reducing intensity and making the target object appear flat.
1.2.2 Lighting Coverage and Fixture Quantity
Beam angle directly affects how much area one fixture can illuminate.
A narrow beam provides stronger intensity and longer projection distance, making it suitable for accent lighting such as tall trees, sculptures, and architectural details.
A wider beam covers a larger area with softer light distribution, which is more suitable for pathways, gardens, and open landscapes.
By selecting the correct beam angle, you can achieve the required lighting effect while avoiding excessive fixtures and unnecessary installation costs.
1.2.3 Visual Experience and Design Effect
Landscape lighting is not only about providing visibility. It is also about creating atmosphere and highlighting the beauty of outdoor spaces.
A narrow beam helps you create dramatic effects with stronger contrast and depth.
A medium beam provides balanced illumination for natural and comfortable environments.
A wide beam creates softer and more uniform lighting for larger areas.
Therefore, beam angle selection directly influences the final visual experience of your landscape design.
1.2.4 Project Efficiency and Installation Risk
During real projects, incorrect beam angle selection may lead to additional adjustments after installation, including changing fixture positions, replacing optics, or adding more lights.
By evaluating the lighting target, installation distance, and desired effect before installation, you can reduce project risks and achieve the original design vision more efficiently.

2. Common Beam Angles for Landscape Lighting Applications
Different landscape projects require different beam angles. There is no single “best” beam angle for every application.
The correct choice depends on the lighting purpose and installation conditions.
2.1 Narrow Beam Angle (10°-15°): Highlighting Tall Objects
Narrow beam angles are commonly used for accent lighting.
Typical applications include:
- Tall trees
- Large sculptures
- Flag poles
- Architectural landscape elements
Because the light is highly concentrated, narrow beams can create a strong vertical lighting effect.
For example, when uplighting a tall tree, a 10°-15° beam can emphasize the tree trunk and branches while creating dramatic shadows.
Choose this option when you need strong visual focus rather than wide coverage.
2.2 Medium Beam Angle (20°-35°): The Most Common Choice
Medium beam angles are the most widely used option in landscape lighting projects.
They provide a good balance between brightness and coverage.
Typical applications include:
- Small and medium trees
- Shrubs
- Garden features
- Residential landscapes
- Hotel outdoor areas
A 24° or 30° beam angle is often selected because it provides enough intensity while covering a reasonable area.
This is usually the safest choice for your general landscape projects.
2.3 Wide Beam Angle (40°-60°): Creating Soft Ambient Lighting
Wide beam angles are designed for larger coverage areas and softer lighting effects.
Typical applications include:
- Pathways
- Open gardens
- Courtyard areas
- Public landscapes
Wide beams help create comfortable ambient lighting without strong contrast.
Use wider beams when your goal is comfort and overall visibility.
2.4 Beam Angle Selection Table
| Beam Angle | Lighting Effect | Recommended Applications |
| 10°-15° | Focused and dramatic | Tall trees, sculptures, feature lighting |
| 20°-35° | Balanced illumination | General landscape lighting, gardens, shrubs |
| 40°-60° | Soft and wide coverage | Pathways, open spaces, ambient lighting |
| Adjustable Beam | Flexible distribution | Complex projects requiring precise control |
3. How to Choose the Right Beam Angle for Landscape Lighting Design
Selecting the right beam angle requires more than simply checking the product specifications. A suitable beam angle should match the lighting target, installation conditions, and the desired visual effect.
Before choosing a fixture, you should evaluate the project from four key aspects:
- What object needs to be illuminated?
- How far is the fixture installed from the target?
- What lighting effect do you want to create?
- Do you need flexibility for on-site adjustment?
A proper beam angle selection helps achieve better lighting performance, reduce unnecessary fixtures, and avoid costly adjustments after installation.
3.1 Consider the Lighting Target
The first step is identifying the object you want to illuminate. Different targets require different beam distributions.
3.1.1 Trees and Landscape Features
Trees are one of the most common applications for landscape spotlights. The correct beam angle depends mainly on tree height, canopy size, and the desired lighting effect.
For tall trees:
- Use narrow beams such as 10°-15°
- Create strong vertical emphasis
- Highlight trunks, branches, and tree structures
- Achieve a dramatic uplighting effect
For example, when illuminating a tall tree from the ground, a narrow beam helps project light upward and maintain visual focus without excessive light spill.
For medium-sized trees:
- Use medium beams such as 20°-35°
- Provide balanced coverage
- Create natural brightness across the trunk and foliage
Medium beam angles are often a safer choice for residential gardens, hotels, and landscape projects where both visibility and aesthetics are important.
3.1.2 Buildings and Facades
Facade lighting requires more careful beam angle selection because the final effect depends on building height, installation distance, and surface texture.
When designing architectural lighting, consider:
- Building height
- Distance between fixture and wall
- Surface materials and textures
- Desired lighting effect
For architectural details and accent lighting:
Narrow beams can be used to highlight specific elements such as columns, textures, sculptures, or decorative structures.
For uniform wall washing:
Wider beam angles or asymmetric optics are usually preferred because they provide smoother light distribution and reduce uneven brightness.
For example, textured stone walls often benefit from grazing light with narrower beams, while smooth building facades usually require wider and more uniform illumination.
3.1.3 Pathways and Open Areas
For pathways, gardens, and public outdoor spaces, the goal is usually comfortable visibility rather than dramatic highlighting.
Recommended:
- Use 40°-60° beam angles
- Create wider coverage
- Reduce strong contrast and dark areas
- Provide a comfortable outdoor atmosphere
A wider beam helps illuminate larger areas with fewer fixtures, making it suitable for walkways, courtyards, parks, and residential landscapes.
3.2 Consider Installation Distance
Installation distance is one of the most important factors when selecting a beam angle, but it is often overlooked during the design process.
The same beam angle can create completely different lighting effects depending on the distance between the fixture and the target.
For example:
A 30° beam installed 1 meter away from a tree creates a smaller and more concentrated lighting area.
The same 30° beam installed 5 meters away will create a much wider coverage area with lower intensity.
You can estimate the coverage width using this formula:
Coverage Width ≈ 2 × Distance × tan(Beam Angle ÷ 2)
Example:
A spotlight with a 30° beam angle installed 3 meters away from a wall:
Coverage Width ≈ 2 × 3 × tan(15°) ≈ 1.6 meters
This calculation helps you estimate fixture spacing, determine the required quantity of lights, and avoid problems such as dark areas or overlapping illumination.
For professional projects, combining beam angle calculations with photometric data (IES/LDT files) provides more accurate lighting results before installation.

3.3 Consider Your Desired Lighting Effect
The desired lighting effect is another important factor when selecting the right beam angle. The same fixture with different beam distributions can create completely different visual results.
Before choosing a beam angle, you should first define whether the goal is to highlight a specific feature, create comfortable general illumination, or achieve uniform wall washing.
3.3.1 Accent Lighting: Highlighting Key Features
Accent lighting is used to draw attention to specific objects and create visual focus within a landscape.
Recommended beam angle:
- 10°-24°
Suitable for:
- Tall trees
- Sculptures
- Architectural details
- Landscape focal points
- Decorative elements
A narrow beam concentrates light on a specific area, creating stronger contrast and depth. It is ideal when you want to emphasize the shape, texture, or unique characteristics of a feature.
For example, a narrow beam spotlight can highlight the structure of a tree canopy or create dramatic shadows on architectural elements without causing excessive light spill.
3.3.2 General Landscape Illumination: Creating Balanced Outdoor Lighting
General landscape illumination focuses on creating comfortable, functional, and visually balanced lighting across outdoor spaces.
Recommended beam angle:
- 30°-60°
Suitable for:
- Gardens
- Pathways
- Courtyards
- Residential landscapes
- Hotel outdoor areas
- Public spaces
Medium and wide beam angles provide broader coverage and smoother light distribution. They are suitable for areas where the goal is to create a welcoming atmosphere rather than highlight a single object.
Using the correct beam angle helps reduce dark areas, improve visual comfort, and achieve consistent illumination across the landscape.
3.3.3 Wall Washing Effect: Achieving Uniform Facade Illumination
Wall washing is designed to create smooth and even brightness across vertical surfaces, making it widely used in architectural and facade lighting projects.
Recommended beam angle:
- Wide beam angles
- Asymmetric optics
Suitable for:
- Building facades
- Landscape walls
- Architectural surfaces
- Textured walls
The goal of wall washing is to achieve uniform illumination while minimizing hotspots, harsh shadows, and unnecessary light waste.
For large facades, asymmetric optics can provide better light distribution by directing more light toward the wall surface and reducing unwanted upward light.
3.4 Match Beam Angle with Lighting Goals
| Lighting Goal | Recommended Beam Angle | Main Purpose |
| Highlight specific features | 10°-24° | Create focus and dramatic effects |
| Provide general landscape lighting | 30°-60° | Achieve comfortable and balanced illumination |
| Illuminate walls and facades | Wide beam / Asymmetric optics | Create smooth and uniform brightness |
For professional landscape projects, selecting the right beam angle often requires photometric analysis and optical experience.
4. Adjustable Beam Angle vs Fixed Beam Angle: Which One Is Better?
When selecting landscape lighting fixtures, you may need to decide between fixed beam angle and adjustable beam angle solutions.
4.1 Fixed Beam Angle Lighting
Fixed beam angle lights provide a specific optical distribution.
Advantages:
- Simple design
- Stable optical performance
- Cost-effective
- Easy for standard projects
They are suitable for projects where:
- Lighting requirements are clearly defined
- Installation conditions are predictable
- Large quantities of the same lighting effect are required
However, fixed beam products have limited flexibility.
If project conditions change during installation, replacing fixtures may increase cost and delay.
4.2 Adjustable Beam Angle Lighting
Adjustable beam angle lighting allows you to modify the light distribution according to project requirements.
Advantages:
- Greater design flexibility
- Easier on-site adjustment
- Suitable for complex environments
- Reduces project risks
Adjustable beam angle solutions are especially useful for:
- Large landscape projects
- Hotels and resorts
- Commercial outdoor spaces
- Customized architectural lighting projects
During installation, designers may discover that the original lighting position or distance needs adjustment.
With adjustable beam angle fixtures, you can optimize the lighting effect without changing the entire product.
This helps reduce:
- Installation mistakes
- Replacement costs
- Project delays
5. Common Mistakes When Selecting Landscape Lighting Beam Angles
5.1 Choosing Beam Angle Only Based on Wattage
A common mistake is assuming:
Higher wattage = Better lighting
This is incorrect.
A 50W fixture with the wrong beam angle may perform worse than a 30W fixture with the correct optical design.
Lighting performance depends on:
- Beam angle
- Optical system
- Installation distance
- Light distribution
5.2 Using Too Narrow Beam Angle
A narrow beam can create dramatic effects, but using it incorrectly may cause:
- Hotspots
- Uneven brightness
- Limited coverage
- Excessive contrast
Always check the relationship between beam angle and target size.
5.3 Ignoring Photometric Data
Do not select landscape lighting only by looking at basic specifications.
Professional projects should review:
- IES files
- LDT files
- Light distribution curves
- Lighting simulation results
Photometric data helps you understand the real lighting performance before installation.
This can significantly reduce project risks.

6. How Professional Lighting Manufacturers Help Optimize Beam Angle Selection
A reliable lighting manufacturer should provide more than products.
They should support your entire lighting design process.
6.1 Providing Accurate Optical Data
Professional manufacturers should provide:
- Accurate beam angle measurement
- Light distribution curves
- IES files
- LDT files
These technical documents help designers make confident decisions.
6.2 Customized Beam Angle Solutions
Every project has different requirements.
A professional manufacturer can help you:
- Customize optics
- Adjust beam angles
- Recommend suitable power
- Optimize light distribution
For special landscape projects, standard products may not always achieve the desired effect.
Customized optical solutions can provide better results.
6.3 Supporting Project-Based Lighting Design
A professional supplier should not only provide fixtures.
They should also provide:
- Lighting suggestions
- Installation recommendations
- Photometric simulation support
- Technical communication
This cooperation helps ensure that the final installation matches the original design vision.
7. Final Thoughts
Adjusting Beam Angles for Landscape Lighting Design
Choosing the right LED beam angle helps improve lighting performance, reduce installation risks, and achieve better project results. GS LIGHT provides professional optical support, customized beam angle solutions, and photometric simulation services to help you deliver successful lighting projects.
FAQ
What beam angle is best for landscape lighting?
The best beam angle depends on the application. Narrow beams are suitable for accent lighting, medium beams work well for general landscape lighting, and wide beams are better for ambient illumination.
How do I choose the right beam angle for tree uplighting?
For tall trees, 10°-15° narrow beams are commonly used to create focused uplighting effects. Medium-sized trees usually work better with 20°-35° beams.
How does installation distance affect landscape lighting beam angle?
Installation distance directly affects coverage width. The farther the fixture is installed, the larger the illuminated area becomes.
What beam angle is suitable for facade and wall washing applications?
Facade lighting usually requires wide beam angles or asymmetric optics to create uniform wall illumination and reduce hotspots.
How can I avoid hotspots and uneven lighting in landscape projects?
You should select the correct beam angle, review photometric data, and consider installation distance before finalizing fixture placement.
Are adjustable beam angle landscape lights better than fixed beam lights?
Adjustable beam angle lights provide more flexibility and are especially suitable for complex projects where installation conditions may change.
What photometric data should I check before selecting landscape lights?
You should review IES files, LDT files, beam angle data, and light distribution curves.
Can manufacturers customize beam angles for LED landscape lighting?
Yes. Professional manufacturers can customize optics, beam angles, and lighting solutions according to specific project requirements.